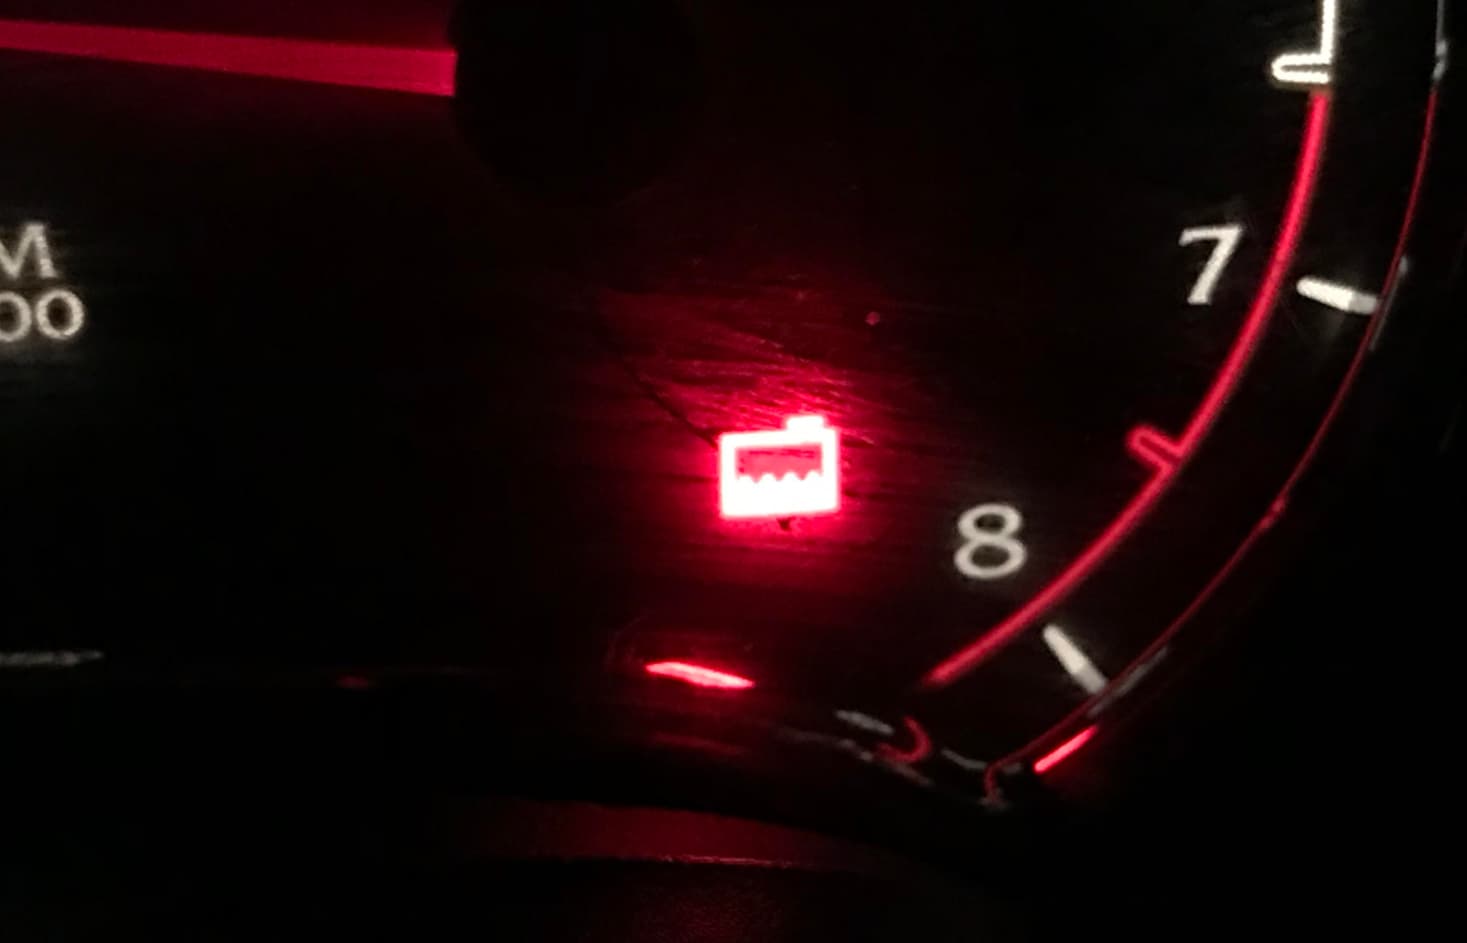
Imagine you’re driving along the highway, enjoying the scenery, when suddenly you notice a light on your dashboard – the dreaded low coolant light.
Don’t panic! This is a common issue that many car owners face at some point.
How To Reset Low Coolant Light In 30 Seconds?

In this article, we’ll walk you through everything you need to know about the low coolant light, including what it means, why it’s important, and most importantly, how to reset it in just 30 seconds.
We’ll also cover some common causes of low coolant and what you can do to prevent it from happening again. So buckle up and let’s dive in!
What is the Low Coolant Light and Why is it Important?
Before we get into how to reset the low coolant light, let’s first understand what it is and why it matters.
The low coolant light is a warning indicator on your car’s dashboard that alerts you when the coolant level in your vehicle’s cooling system has dropped below a certain point.
Coolant, also known as antifreeze, is a liquid that circulates through your car’s engine to keep it from overheating. It’s crucial for the proper functioning and longevity of your engine.
If the coolant level gets too low, it can lead to some serious problems:
- Engine overheating: Without enough coolant, your engine can quickly overheat, causing major damage and potentially leaving you stranded on the side of the road.
- Corrosion and rust: Coolant also helps prevent corrosion and rust inside your engine. Low coolant levels can allow these issues to develop, leading to costly repairs down the line.
- Poor performance: An engine that’s running too hot won’t perform at its best. You may notice reduced power, poor fuel efficiency, or even stalling.
So when that low coolant light comes on, it’s important to take it seriously and address the issue promptly. Ignoring it could lead to a hefty repair bill or even a totaled engine.
Common Reasons for Low Coolant
Now that we know why the low coolant light is important, let’s look at some common reasons why your coolant level might be low in the first place:
- Leaks: The most common cause of low coolant is a leak somewhere in the cooling system. This could be a leak in a hose, the radiator, the water pump, or even the engine itself.
- Overheating: If your engine has overheated recently, it may have boiled off some of the coolant, leading to a low level.
- Worn out parts: Over time, parts of your cooling system like hoses, gaskets, and seals can wear out and start to leak.
- Faulty sensor: In some cases, the low coolant light itself may be malfunctioning due to a faulty sensor, triggering the warning even though the coolant level is fine.
If you’re unsure what’s causing your low coolant, it’s always best to have a mechanic take a look. They can diagnose the issue and recommend the appropriate fix.
How to Check Your Coolant Level?
Before we get into resetting the low coolant light, let’s quickly cover how to check your coolant level yourself. It’s a good idea to check it regularly, even if the warning light isn’t on. Here’s how:
- Park your car on a level surface and wait for the engine to cool completely. Never open the coolant reservoir when the engine is hot – the coolant can be boiling and may spray out, causing serious burns.
- Open the hood and locate the coolant reservoir. It’s usually a clear plastic tank near the radiator.
- Check the coolant level against the markings on the side of the reservoir. It should be between the “Low” and “Full” lines.
- If the level is low, you’ll need to add more coolant to bring it up to the proper level.
How to Add Coolant to Your Car?
If you’ve determined that your coolant level is indeed low, it’s time to add more. Here’s a step-by-step guide:
- Purchase the correct coolant for your vehicle. Check your owner’s manual to see what type is recommended. Never mix different types of coolant!
- With the engine cool, locate the coolant reservoir under the hood. It’s usually a clear plastic tank with a brightly colored cap.
- Place a funnel into the reservoir and slowly pour in the coolant until it reaches the “Full” line. Be careful not to overfill it.
- Replace the cap securely and close the hood.
- Start the engine and let it run for a few minutes to allow the coolant to circulate.
- Recheck the coolant level to ensure it’s at the proper level.
If you’re not comfortable adding coolant yourself, don’t hesitate to take your car to a mechanic. They can top it off and check for any potential leaks or other issues.
How to Reset the Low Coolant Light in 30 Seconds?
Okay, you’ve added coolant and the level is where it should be. But that pesky low coolant light is still shining bright on your dashboard. What gives?
In many cases, the light won’t turn off automatically just because you’ve added coolant. You need to reset it manually.
The good news is, it’s a quick and easy process that you can do in about 30 seconds.
Here’s how:
- Start the engine and let it idle.
- Locate the reset button for the low coolant light. This is usually on the instrument cluster, near the gauges. It may be labeled something like “Reset,” “Mode,” or it may be a picture of a tire.
- Press and hold the reset button until the low coolant light blinks a few times and then goes off. This may take 5-10 seconds.
- Release the button and the light should stay off. If it comes back on, repeat the process.
That’s it! You’ve successfully reset the low coolant light. Just remember, if the light comes on again soon after resetting it, there may be an underlying issue that needs to be addressed.
Don’t ignore it – get it checked out by a professional.
Step-by-Step Instructions for Popular Car Models
While the general process for resetting the low coolant light is similar across most vehicles, the exact steps may vary slightly depending on your car’s make and model. Here are specific instructions for a few popular brands:
| Car Make | Reset Instructions |
|---|---|
| Ford | 1. Turn the ignition to the “On” position without starting the engine 2. Press and hold the “Setup” button on the dashboard until “Reset For System Check” appears 3. Use the arrow buttons to select “Coolant,” then press “Reset” 4. Turn off the ignition |
| Chevrolet | 1. Turn the ignition to the “On” position without starting the engine 2. Press the “Menu” button on the instrument cluster until “Vehicle Information” appears 3. Scroll to “Oil Life Remaining” and press “Set/Clear” 4. Press and hold “Set/Clear” until “Coolant” appears, then release 5. Press “Set/Clear” again to reset the light |
| Toyota | 1. Turn the ignition to the “On” position without starting the engine 2. Press and hold the “Trip” button on the instrument cluster until “Trip A” appears 3. Continue holding the button until “Coolant Temp” appears and the light goes off 4. Release the button |
| Honda | 1. Turn the ignition to the “On” position without starting the engine 2. Press and hold the “Select/Reset” button on the instrument cluster until the light starts blinking 3. While the light is blinking, press and hold the button again until the light goes off 4. Release the button |
If you don’t see your car’s make listed here, consult your owner’s manual for specific instructions on resetting the low coolant light.
You can also search online for “[Your Car Maker] reset low coolant light” to find tutorials and videos.
What to Do if the Light Keeps Coming On?
If you’ve topped off your coolant and reset the light, but it keeps coming back on, there’s likely an underlying issue that needs to be addressed. Don’t ignore it! Continuing to drive with low coolant can cause serious damage to your engine.
Here are some steps to take if the light persists:
- Check for visible leaks. Look under your car for any puddles of coolant, and inspect hoses and connections for signs of leakage.
- Have a mechanic perform a pressure test on your cooling system to check for less visible leaks.
- Consider replacing old or worn-out parts like hoses, gaskets, or the radiator cap.
- In some cases, the issue may be a faulty sensor that’s triggering the light even when the coolant level is fine. A mechanic can diagnose this and replace the sensor if needed.
Remember, catching and fixing coolant issues early can save you from more serious and expensive problems down the road. If you’re unsure what’s causing your low coolant, don’t hesitate to take your car to a trusted mechanic for a professional diagnosis.
How Long to Run the Engine After Adding Coolant?
After you’ve topped off your coolant and reset the light, it’s a good idea to let your engine run for a bit to allow the new coolant to circulate through the system. But how long should you let it run?
In general, let your engine idle for at least 10-15 minutes after adding coolant. This gives the coolant time to mix with the existing fluid and reach all parts of the engine.
Keep an eye on your temperature gauge during this time – it should stay within the normal range.
If your engine has been overheating, it’s best to let it cool down completely before adding more coolant. Once it’s cool, add the coolant and then let the engine run for a few minutes.
If the temperature starts to climb again, shut it off and have it towed to a mechanic. Continuing to run an overheating engine can cause severe damage.
Also Check: How To Reset Traction Control Light
Conclusion:
We hope this guide has helped demystify the low coolant light and given you the confidence to handle it if it pops up on your dashboard. Remember, the key points are:
- The low coolant light is an important warning that should not be ignored.
- Low coolant can be caused by leaks, overheating, worn out parts, or a faulty sensor.
- You can check and top off your coolant level yourself, but be careful and use the correct type of coolant.
- Resetting the light is usually a simple process that takes about 30 seconds.
- If the light keeps coming on, there may be an underlying issue that needs professional attention.
- After adding coolant, let your engine run for at least 10-15 minutes to allow circulation.
By staying on top of your car’s coolant level and addressing any issues promptly, you can keep your engine running smoothly and avoid costly repairs down the line.
Happy driving!


