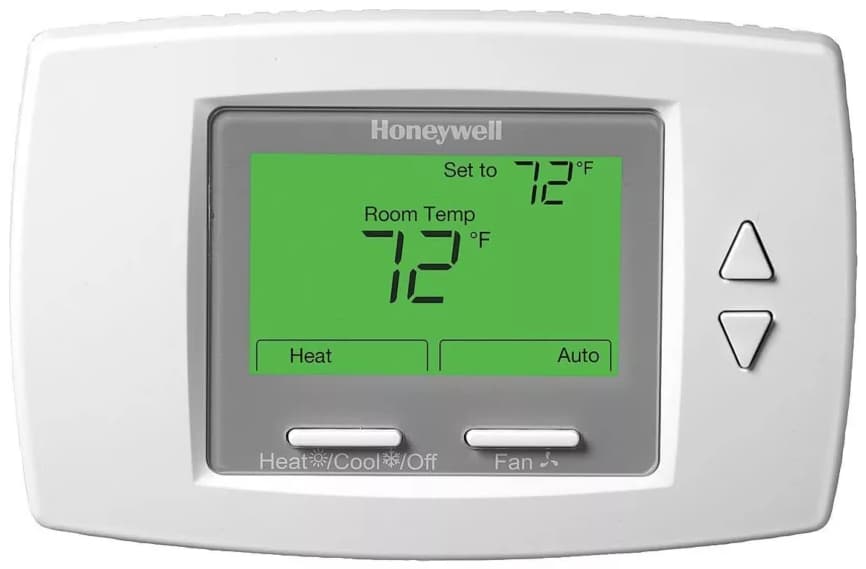
Seeing a blinking “Heat On” message on your Honeywell thermostat can be concerning, but it usually indicates normal operation. The blinking typically means the system is gearing up to run the heating but has a built-in delay to protect components.
However, in some cases, nonstop blinking could signal a problem needing troubleshooting.
Honeywell Thermostat Heat on Blinking

This comprehensive guide explains the ins and outs of the common Honeywell thermostat “Heat On” blinking scenarios.
Also Check: Honeywell Hot Water Heater Status Light Blinking
So Why Does the Honeywell Thermostat Show “Heat On” Blinking?
Honeywell thermostats have a blinking “Heat On” indicator for two main reasons:
1. Normal Delay Mode
- When the “Heat On” light blinks on a Honeywell thermostat, this generally signals the thermostat is in a delay mode.
- The blinking is a safety feature on many thermostat models to prevent short cycling damage.
- Key aspects of the delay mode:
- Delay Period: Usually about 5 minutes during which “Heat On” blinks. This prevents HVAC short cycling.
- Short Cycling Prevention: Short cycling means the HVAC turns on and off rapidly, increasing wear. The delay stops this.
- Normal Operation: After the delay expires, the light stops blinking, and heating starts/resumes as needed.
2. System Malfunction
- If the “Heat On” message persists blinking longer than the standard delay, this indicates a possible HVAC malfunction.
- Potential culprits for abnormally prolonged blinking include:
- Faulty control board
- Incorrect pressure switch positioning
- Clogged air filter
So in summary, brief blinking is normal but extended, endless blinking often means your system needs troubleshooting.
At Normal Situation: “Heat On” is Blinking
During normal operation when extra heating is required, your Honeywell thermostat will initiate a heating call. The “Heat On” or flame icon blinking indicates the system is going through its standard delay period before firing up the furnace.
- Once the 5-minute or so delay expires, the furnace should turn on and heat your home. The blinking alerts you this will happen.
- If the furnace doesn’t start after the blinking stops, then you likely have an issue needing resolution.
Key Takeaway: A Brief “Heat On” blinking is your thermostat’s way of saying heating will start shortly. This delay protects your HVAC components.
Abnormal Situations: Continuous Blinking
When the “Heat On” blinking persists longer than several minutes or seems to occur nonstop, troubleshooting is required.
Potential reasons for endless Honeywell thermostat flashing include:
- Control Board Malfunction: An issue with the thermostat control board could lead to stuck blinking. This is an electrical defect that needs professional service.
- Pressure Switch Positioning: Furnace pressure switches verify airflow before allowing heat. If positioned incorrectly, this could block heating operation while allowing blinking.
- Clogged Air Filter: A severely dirty filter reduces airflow. This can mimic pressure switch issues and cause nonstop “Heat On” blinking.
Diagnose the specific problem by checking for error codes, testing components like the air filter, and contacting an HVAC technician if needed.
Key Takeaway: Unlike short blinking cycles, continuous long-term blinking often indicates a hardware or wiring malfunction needing diagnosis and repairs.
What are the Other Reasons for Honeywell Heat On Blinking?
While system faults account for most endless “Heat On” blinking situations, other causes exist too:
Power Outage
- Losing power can disrupt thermostat operation until systems reset.
- When electricity returns after an outage, restarting the system compressor may trigger safety blinking.
- Be patient for the thermostat to resume normal operation after the compressor restarts. Blinking should stop within the standard 5-minute window.
Switching from Cooling to Heating
- Transitioning between heating and cooling stresses the system.
- Similar to after a power loss, the abrupt swing between operating modes can initiate a blinking delay.
- Wait for blinking to cease after mode changes before expecting heating or cooling startup.
Battery Replacement
- Whenever you insert fresh thermostat batteries, blinking icons are typical during the recalibration process.
- Let the thermostat complete its internal reset sequence to clear up blinking triggers from battery replacement.
Low Battery Charge
- As batteries become severely drained, this can manifest as blinking icons and unusual thermostat behavior.
- Swap out very low batteries for a complete set of new ones to resolve artifact issues. Modern Honeywell units also display low battery warnings.
Key Takeaway: Various disruptions like power failures can initiate standard Honeywell thermostat blinking sequences. Rule out these basic causes before delving into advanced troubleshooting.
Actionable Steps for Troubleshooting Honeywell Thermostat “Heat On” Blinking
Use the flowchart below to methodically troubleshoot and resolve the Honeywell thermostat “Heat On” blinking:
Now let’s explore Honeywell blinking scenarios in more detail:
Scenario 1: Normal Delay Mode
If you see “Heat On” blinking on your Honeywell thermostat:
- Wait for the Delay: Give the system about 5 minutes to complete the short cycling protection delay before heating startup.
- Check Operation: Once the blinking stops, verify your heating is turned on. If so, all is working correctly!
Scenario 2: Continuous Blinking Beyond Normal Delay
If your system exceeds the standard 5-minute “Heat On” blinking window:
- Inspect Settings: Check your thermostat mode is set properly to call for heating.
- Note Error Messages: Inspect your thermostat screen for any specific fault codes.
- Reset Thermostat:
-
- Turn off the thermostat’s power at either the unit or via the breaker.
- Leave the thermostat de-energized for 60 seconds.
- Restore power and observe if the “Heat On” blinking returns.
- Allow roughly 10 minutes post-reset for your HVAC system to fully restart.
-
Evaluate Performance: If the heating operation remains stalled after the reset sequence, an underlying hardware or wiring issue likely exists needing professional service.
Key Takeaway: Attempt a full thermostat reset after long blinking episodes before contacting an HVAC technician.
Scenario 3: Blinking After Power Outage or Mode Change
- Allow System Adjustment: Give your HVAC system several minutes to stabilize when switching modes or recovering from an outage.
- Reset if Needed: If blinking lingers for over 10 minutes post-event, follow the reset procedure from Scenario 2 above.
Scenario 4: Blinking After Battery Replacement or Due to Low Battery
- For Battery Swaps: Permit 5-10 minutes for your thermostat to recalibrate internally after new batteries are inserted before expecting normal operation.
- For Low Batteries: Replace very weak batteries causing erratic behavior with a fresh set of name-brand alkaline cells.
Key Takeaway: Rule out battery issues when dealing with unusual thermostat blinking situations.
Additional Troubleshooting Steps
If you continue battling “Heat On” blinking problems after methodically working through the scenario-based troubleshooting steps above:
- Validate Circuit Breakers: Ensure all HVAC-related circuit breakers are switched properly to the “On” position.
- Inspect HVAC Components: Check for visible airflow obstructions and listen for odd noises that can indicate malfunctions.
- Consult Product Manual: Review thermostat specifications and troubleshooting guidance within your model’s manual.
- Contact Manufacturer: Seek additional support by calling Honeywell customer service if the problem persists.
- Consider Pro Help: Engage a professional HVAC technician for complex or difficult-to-resolve issues.
Key Takeaway: Use all ancillary troubleshooting resources available before deciding if professional service is ultimately needed.
Scenario 5: Specific Model Issues (e.g., Honeywell Pro Series)
Honeywell’s Pro Series and other specialized thermostat lines have unique troubleshooting considerations:
- Consult Model Manual: Honeywell has produced many thermostat models over the years. Review your specific version’s troubleshooting guidance.
- Follow Error Code Protocols: If your thermostat shows specialized fault codes, follow the steps outlined in your model’s documentation.
Key Takeaway: Adjust troubleshooting for your particular Honeywell thermostat model’s specifications and error alerts.
Here are some examples of Honeywell Wi-Fi-connected model error codes for reference:
T5 Wi-Fi Honeywell Error Codes
- 164 – Heat pump issue detected. Contact Honeywell support at 1-800-633-3991.
- 168 – Wi-Fi connectivity error. Reboot the device and check the network. Call 1-800-633-3991 if persists.
- 170 – Internal memory failure. Call Honeywell support at 1-800-633-3991.
- 171 – Date and time not set. Set the proper date and time in the device settings.
- 173 – Temperature sensor malfunction. Contact Honeywell support at 1-800-633-3991.
- 175 – Power interrupted then restored. No action is necessary.
- 181/182 – Replace the air filter. Press dismiss after replacing the filter.
- 184 – Replace the humidifier pad. Press dismiss after replacing.
- 185 – Replace the dehumidifier filter. Press dismiss after replacing.
- 187 – Replace or clean the ventilator filter. Press dismiss after replacing.
- 188/189 – Replace the UV bulb. Contact HVAC technician to replace.
- 210 – Register online for outdoor temperature access.
- 388 – Register online for remote access features.
- 399 – No internet connection. Check network and router connections.
- 400 – No Wi-Fi signal detected. Move the thermostat closer to the router.
- 508 – Wi-Fi not configured properly. Re-configure Wi-Fi settings.
T6 Pro Smart Programmable Thermostat
- 164 – Heat pump issue. Contact Honeywell support at 1-800-633-3991.
- 168 – Wi-Fi board failure. Contact Honeywell support at 1-800-633-3991.
- 170 – Internal storage failure. Contact Honeywell support at 1-800-633-3991.
- 171 – Date and time incorrect. Set the proper date and time.
- 173 – Temperature sensor failure. Contact Honeywell support at 1-800-633-3991.
- 175 – Power restored. No action is necessary.
- 177 – Indoor temperature sensor issue. Contact Honeywell support.
- 178 – Outdoor temperature sensor issue. Contact Honeywell support.
- 181/182 – The air filter needs changing. Press dismiss after replacing.
- 183 – Clean humidifier tank and filter. Press dismiss when done.
- 184 – Replace the humidifier pad. Press dismiss after replacing.
- 185 – Replace the dehumidifier filter. Press dismiss after replacing.
- 186 – Clean ventilator core. Press dismiss after cleaning.
- 187 – Replace or clean the ventilator filter. Press dismiss after replacing.
- 188/189 – Replace the UV bulb. Contact the HVAC technician.
- 210 – Register for outdoor temperature access.
- 388 – Register for remote access features.
- 399 – No internet connection. Check the network and router.
- 400 – No Wi-Fi signal. Move the thermostat closer to the router.
- 508 – Re-configure Wi-Fi settings.
Key Takeaway: Consult your exact Honeywell thermostat model’s documentation for tailored troubleshooting guidance around specialized blink codes and error messages.
FAQs About Honeywell Thermostat Heat On Blinking:
- Why is my thermostat flashing heat on but no heat activates?
If the thermostat signals heating should start but actual warm airflow never initiates, common causes include:
- Dirty air filter reducing airflow
- Jammed blower fan motor unable to spin
- The furnace pressure switch is stuck in the wrong position
- Loose wiring connection
Thoroughly inspecting HVAC components and connections lets you isolate the mismatch between heating demand and operation.
- How long does it take for a Honeywell thermostat to start heating?
After initiating a heating call, expect up to 5 minutes for the “Heat On” icon to stop blinking, then warm airflow shortly thereafter once the furnace warms up. Total time varies by model and environmental factors.
Call a technician if the heating doesn’t activate within 10 minutes of the blinking indicator disappearing.
- Why does the word “Heat” keep blinking on my Honeywell thermostat?
Typically, repetitive long-duration blinking signifies:
- Faulty control board directives
- Faulty furnace pressure switch signaling
- Loose wiring triggers
- Low batteries
Methodically troubleshoot the issue using guided scenarios from earlier in this article.
Conclusion: Monitor Honeywell Blinking Patterns to Ensure Proper Function:
Seeing “Heat On” blinking on your Honeywell thermostat is generally perfectly normal and signals pending heating operation. During a shorter 5-minute cycling delay, let the blinking run its course. Furnace startup should follow once the indicator light stops flashing.
However, if your system exceeds the standard blinking window or never activates heating after blinking ceases, further inspection is warranted. Thoroughly troubleshoot the scenario using the step-by-step guidance above.
While system faults cause most perpetual Honeywell thermostat blinking, also rule out basic causes like low batteries or recent mode changes before assuming component failures. Adjust troubleshooting details as needed based on your specific Honeywell model’s design and error code specifications.
With this comprehensive overview of Honeywell’s blinking logic, you can now correctly analyze and troubleshoot unusual “Heat On” behavior when it arises.
Properly functioning delay mode blinking ensures efficient, long-lasting climate control.


