Are you tired of looking at the same boring rooms every day? Do you dream of having a beautiful home but think it costs too much money?
You’re not alone! Many people think home improvement means spending thousands of dollars and hiring expensive contractors. But that’s not true at all.
The truth is, you can transform your home with simple tricks that cost very little money.
These smart Home Improvement hacks will make your house look like you hired a professional designer.
The best part? You can do most of them in just one weekend!
Home Improvement Hacks You’ll Wish You Knew Sooner
Let’s dive into these amazing tricks that will completely change how your home looks and feels.
Top 7 Genius Home Improvement Hacks You’ll Wish You Knew Sooner
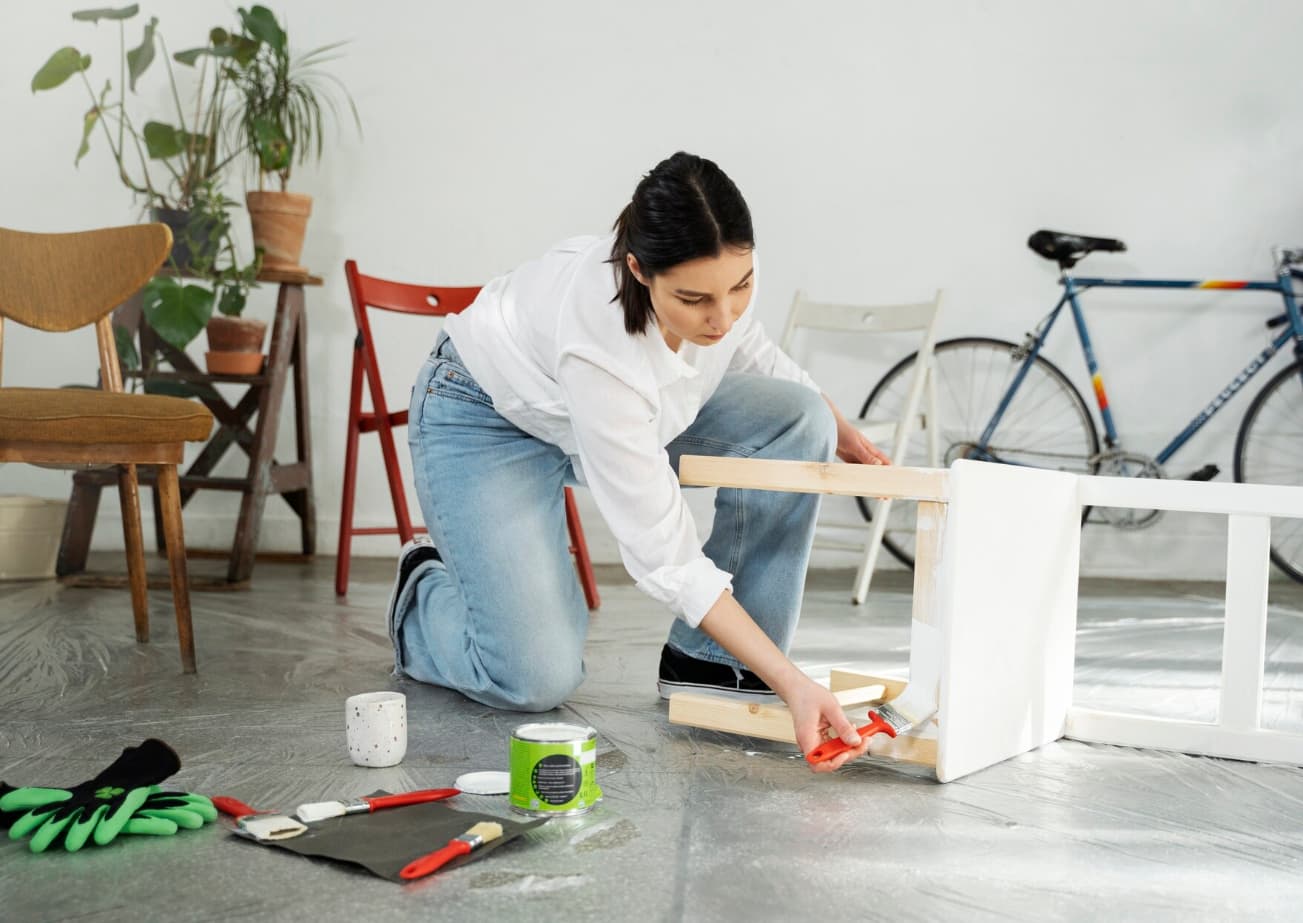
1. Paint Your Kitchen Cabinets Instead of Replacing Them
This is probably the biggest money-saving hack you’ll ever learn. New kitchen cabinets can cost $15,000 to $25,000. But painting your old cabinets? That costs less than $200!
Most people think their old cabinets look terrible and need to be thrown away. But in most cases, the cabinets are still strong and well-built. They just need a fresh new look.
Here’s how to do it right:
- Clean everything first – Use a grease-cutting cleaner to remove all the built-up dirt and cooking grease
- Remove the doors and hardware – Take off hinges, handles, and drawer pulls
- Sand lightly – You don’t need to remove all the old paint, just rough it up a bit
- Use the right primer – This is super important! Use a bonding primer made for kitchen cabinets
- Apply thin coats of paint – Two thin coats look way better than one thick coat
- Let each coat dry completely – Don’t rush this step or your paint will peel later
Pro tip: Choose a semi-gloss or satin paint finish. These are easier to clean and last longer in kitchens.
The result? Your kitchen will look brand new for a tiny fraction of the cost. Your neighbors will ask if you got new cabinets!
2. Use Removable Wallpaper for Instant Room Makeovers
Traditional wallpaper is a nightmare to remove. It takes hours of scraping and steaming, and sometimes you damage the wall underneath.
But removable wallpaper changes everything! This amazing product sticks to your walls but comes off easily when you want to change it. It’s perfect for renters, too!
Here’s what makes it so great:
- No glue needed – It has a special adhesive backing that doesn’t damage walls
- Easy to cut – Use regular scissors or a craft knife
- Hundreds of designs – From wood look to marble to fun patterns
- Perfect for small spaces – Transform a bathroom or closet in under an hour
Where to use it:
- Behind your bed as a headboard
- In a powder room for dramatic effect
- On one accent wall in your living room
- Inside bookcases or cabinets for a pop of color
- On stair risers for a fun surprise
The best part? If you get tired of the design, just peel it off and try something new. No commitment required!
3. Add Crown Molding for an Expensive Look
Crown molding makes any room look more expensive and finished. It’s that decorative trim where the wall meets the ceiling.
Most people think installing crown molding is super hard and expensive. But modern foam crown molding is lightweight, cheap, and easy to install.
Why crown molding works so well:
- It draws your eye upward, making rooms feel taller
- It hides the messy line where paint often looks uneven
- It adds architectural interest to plain rooms
- It makes your home look more expensive than it really is
Installation tips:
- Measure twice, cut once – Take your time with measurements
- Use a miter saw for clean angles (you can rent one for $30)
- Apply construction adhesive AND nail it in place
- Fill nail holes with wood filler and paint over them
- Start with simple, straight pieces before trying corners
| Room Size | Materials Cost | Time Needed | Difficulty Level |
|---|---|---|---|
| Small bedroom | $50-80 | 3-4 hours | Beginner |
| Living room | $100-150 | 5-6 hours | Intermediate |
| Whole house | $300-500 | 2-3 weekends | Intermediate |
Even if your cuts aren’t perfect, caulk and paint will hide small mistakes. The finished result will look like you paid a contractor thousands of dollars!
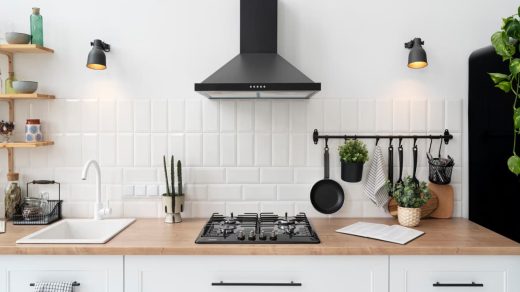
4. Install Under-Cabinet Lighting
Dark countertops make cooking and food prep frustrating. You’re always working in your own shadow!
Under-cabinet lighting solves this problem and makes your kitchen look like something from a fancy magazine. The warm glow creates an amazing ambiance for dinner parties, too.
Types of under-cabinet lighting:
- Puck lights – Small, round lights that create spots of light
- Light strips – Continuous strips that give even lighting
- Light bars – Rigid bars that are easy to install
Installation options:
- Plug-in versions – Easiest to install, but you need outlets nearby
- Battery powered – Great for areas without electrical access
- Hardwired – Most professional looking, but requires electrical work
Quick installation steps:
- Clean the underside of your cabinets thoroughly
- Measure and mark where you want the lights
- Use the adhesive backing or small screws to attach lights
- Hide wires along the back edge of cabinets
- Connect to the power source and test
The difference is incredible! Your countertops will be perfectly lit for cooking, and your kitchen will have a warm, welcoming glow in the evenings.
5. Use Tension Rods for Extra Storage Everywhere
Tension rods are like magic wands for creating storage space. They work by pressing against two surfaces, so no drilling or permanent installation is needed.
Most people only think of tension rods for shower curtains. But these simple tools can solve storage problems all over your house!
Creative tension rod uses:
- Under kitchen sinks – Hang cleaning supplies and dish towels
- In closets – Create extra hanging space for shorter items
- Under bathroom vanities – Store hair tools and cleaning supplies
- In pantries – Hang lightweight items like chip bags
- In laundry rooms – Create drying space for delicate clothes
- Behind doors – Hang scarves, belts, or cleaning supplies
Pro storage tips:
- Use S-hooks to hang more items from one rod
- Choose adjustable rods that fit your exact space
- Look for rods with rubber ends to prevent slipping
- Don’t overload them – check the weight limit first
Before vs After Comparison:
| Area | Before | After |
|---|---|---|
| Under sink | Messy pile of supplies | Organized hanging storage |
| Small closet | Clothes crammed together | Double hanging space |
| Bathroom | Toiletries were scattered on the counter | Neat hanging organizers |
| Pantry | Items falling off shelves | Organized hanging bags |
The best part? When you move or want to reorganize, just remove the tension rod. No holes in walls, no damage, no problem!
6. Create Accent Walls with Wood Planks
Accent walls are a designer trick that makes rooms look more interesting and expensive. Instead of four plain walls, you have one special wall that draws attention.
Wood plank accent walls are trending right now because they add texture and warmth to any room. They look like expensive millwork but cost much less.
Types of wood planks to consider:
- Reclaimed wood – Gives a rustic, farmhouse look
- New pine boards – Clean and modern appearance
- Peel-and-stick wood planks – Easiest installation option
- Plywood strips – Most budget-friendly choice
Where to put accent walls:
- Behind your bed as a dramatic headboard
- Behind your TV to frame the entertainment area
- In dining rooms, to create a cozy feeling
- In-home offices to add professional warmth
Installation steps:
- Start with the longest, straightest wall in the room
- Measure and cut planks to fit your wall height
- Use a level to make sure your first row is perfectly straight
- Apply construction adhesive and nail planks to the wall
- Leave small gaps between boards for a natural look
- Sand and stain or paint as desired
Money-saving tip: Check with local sawmills or lumber yards for discounted wood. Sometimes they have slightly warped boards, perfect for accent walls at half the price.
The transformation is amazing! One accent wall can make your entire room look like it belongs in a home decorating magazine.
7. Upgrade Light Fixtures for Modern Appeal
Nothing dates a room faster than old, ugly light fixtures. Brass ceiling fans from the 1990s and builder-grade fixtures scream “cheap rental apartment.”
But here’s the secret: switching out light fixtures is one of the easiest ways to modernize any room. Most fixtures just screw into the ceiling box, and you can do it in under an hour.
High-impact fixture swaps:
- Replace boring builder-grade fixtures with modern pendant lights
- Swap old ceiling fans for sleek new models with LED lights
- Change bathroom vanity lights to stylish modern designs
- Install statement chandeliers in dining rooms or entryways
Safety first:
- Turn off the power at the circuit breaker before starting
- Test wires with a voltage tester to make sure power is off
- Take a photo of how the old fixture was wired before disconnecting
- If you’re not comfortable with electrical work, hire an electrician
Style tips:
- Choose fixtures that match your room’s style (modern, farmhouse, traditional)
- Consider the size of your room – bigger rooms can handle larger fixtures
- Think about light output – bedrooms need softer light than kitchens
- Mix warm and cool metals throughout your house for an updated look
Budget-friendly options:
- Shop clearance sections at home improvement stores
- Check online marketplaces for gently used fixtures
- Look for simple designs that won’t go out of style quickly
The impact is immediate and dramatic! New light fixtures can make a 20-year-old house look like it was just built.
Transform Your Home This Weekend
These seven genius hacks prove that you don’t need a huge budget to create a beautiful home.
Each one can be completed in a weekend and will make a big difference in how your rooms look and feel.
Start with just one hack that excites you most. Maybe it’s painting those old kitchen cabinets or adding some under-cabinet lighting. Once you see the amazing results, you’ll be motivated to try more!
The best part about these improvements? They add real value to your home while making it more enjoyable to live in every single day.
Ready to get started? Pick your favorite hack from this list and tackle it this weekend.
For even more brilliant Diy Homey
Your dream home is closer than you think!
More Guides: